

The same fixtures and display arrangement can look different during the day and after dark. Daylight may make a wall near the window bright while the featured product receives little emphasis. At night, the accent lighting may become more prominent, while an illuminated sign draws too much attention.
When daylight enters a store, the viewing conditions for products, backgrounds and glass change with it. Lighting design needs to establish where these changes occur, how electric lighting should contribute, which areas need separate adjustment and what customers should be able to see throughout operating hours.
For an overview of lighting layers, beam control and display viewing, see our architectural and display lighting guide. This article focuses on reviewing different daylight conditions and coordinating them with artificial lighting.
1. Map where daylight enters and which displays it affects
Before arranging fixtures and lighting groups, mark the daylight openings and their relationship to key displays on a plan or site photograph.
- Daylight openings: the location and orientation of storefront glazing, entrances, side windows or skylights.
- Surrounding conditions: neighboring buildings, canopies and other obstructions that may affect incoming light.
- Illuminated surfaces: whether daylight mainly reaches the floor, walls, product fronts or the area behind a display.
- Existing shading: its location, adjustable states and normal operating procedure.
- Viewing positions: what customers see from the entrance, aisles and positions used to inspect products closely.
Daylight openings, shading and interior finishes all influence daylight distribution and should be considered together. The U.S. Department of Energy's architectural daylighting guidance discusses these relationships.
Distance from a window alone is insufficient to define an adjustment zone. In deep stores, spaces with side windows and areas screened by tall cabinets, map the actual reach of daylight. Recording obvious sunlit areas also helps identify the times that need closer review.
2. Compare representative times and weather from fixed viewing positions
Choose a few fixed positions at the entrance, along the main aisle and in front of a featured display. Repeat the review under different daylight conditions. Keep products, props and backgrounds as consistent as possible, and record the weather, time, shading state and artificial lighting settings together.
The following conditions provide a starting point. Select the relevant times according to the store's orientation, operating hours and observed problems.
| Review condition | What to check | What to record |
|---|---|---|
| Sunny conditions with substantial daylight | Where sunlight falls; whether products and backgrounds have clear roles; distracting bright surfaces | Affected areas, viewing positions, shading state and lighting group settings |
| Cloudy conditions or predominantly diffuse daylight | Whether products, labels and aisles that previously relied on daylight remain clear | Locations needing electric lighting and any effect on neighboring displays |
| Dusk as daylight decreases | Changes in the relationship between areas and whether a scene adjustment is needed | Conditions for using the scene and its effect on products, backgrounds and task positions |
| Operating after dark | Whether artificial lighting supports the full viewing task and whether signs, backgrounds and featured products work together | Accepted nighttime group settings and photographs from the main viewing positions |
Where the design specifies illuminance targets, the design team should measure at the relevant product, label or task surface. Record the measurement position and the orientation of the measurement plane so the review can be repeated.
Photographs are useful records, but automatic exposure and white balance change their appearance. Use consistent framing and record or maintain consistent camera settings where possible. Approval should also include viewing the display on site.
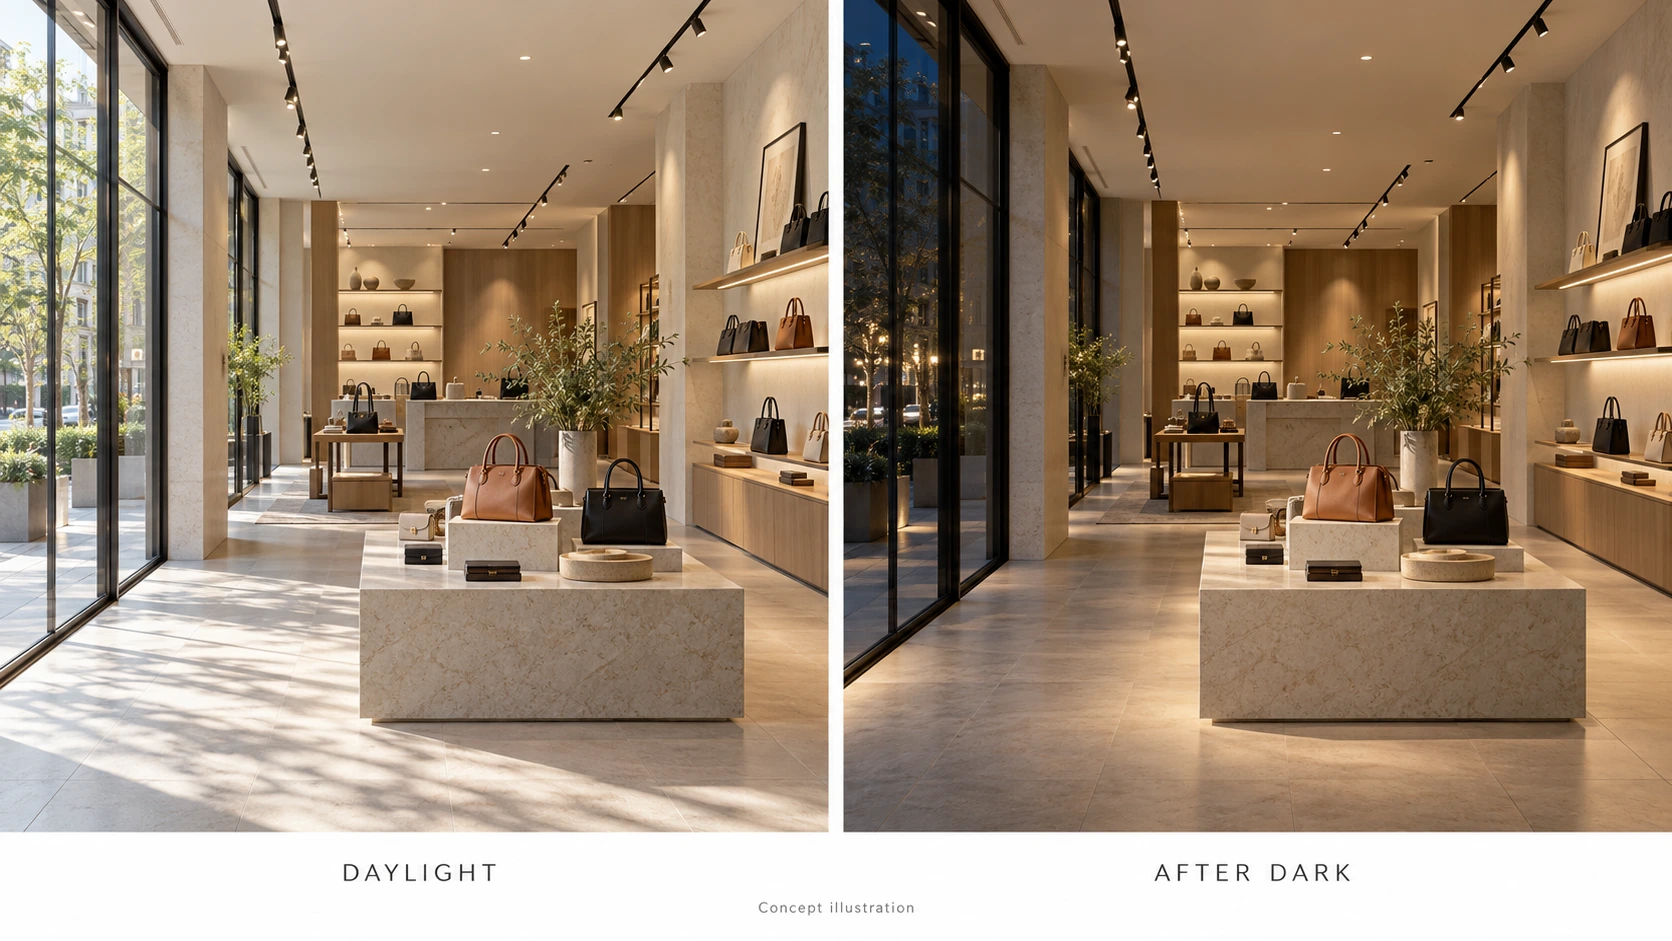
3. Plan adjustments around daylight influence and lighting tasks
Areas near windows, transitional areas and the deeper interior may depend on daylight differently. Lighting groups should account for these areas as well as the roles of ambient lighting, product accents and light needed to read labels.
For example, a wall near the window may already form a bright daytime background while products deeper in the store need additional illumination. Reducing both areas together could improve the window area but leave the rear display unclear. Use this observation to discuss which groups need independent adjustment, then confirm that the selected configuration supports it.
| Observed issue | Check first | Possible adjustment to discuss |
|---|---|---|
| The window area is bright, but products deeper inside are unclear | Daylight reach, product orientation and existing lighting groups | Assess the window background and deeper product lighting separately; check the corresponding aiming directions |
| A featured product lacks emphasis during the day but is prominent at night | Whether daylight mainly illuminates the product or its background | Adjust the relevant background, product accent or display position, then review the nighttime result |
| Sunlit patches or window reflections obscure product details | Direct and reflected light sources, glass and customer sightlines | Review shading, product positions or fixture positions, then return to the original viewing position |
| A sign or background wall draws too much attention at night | Which lighting element changes the display priority | Adjust the corresponding group within the configuration's capabilities while retaining light for other viewing tasks |
Even when daylight is substantial, check labels, product details and aisle visibility individually. Start adjustments in the area with the problem, change one condition at a time and repeat the original viewing route. For the roles of different lighting layers, see our ambient and accent lighting guide.
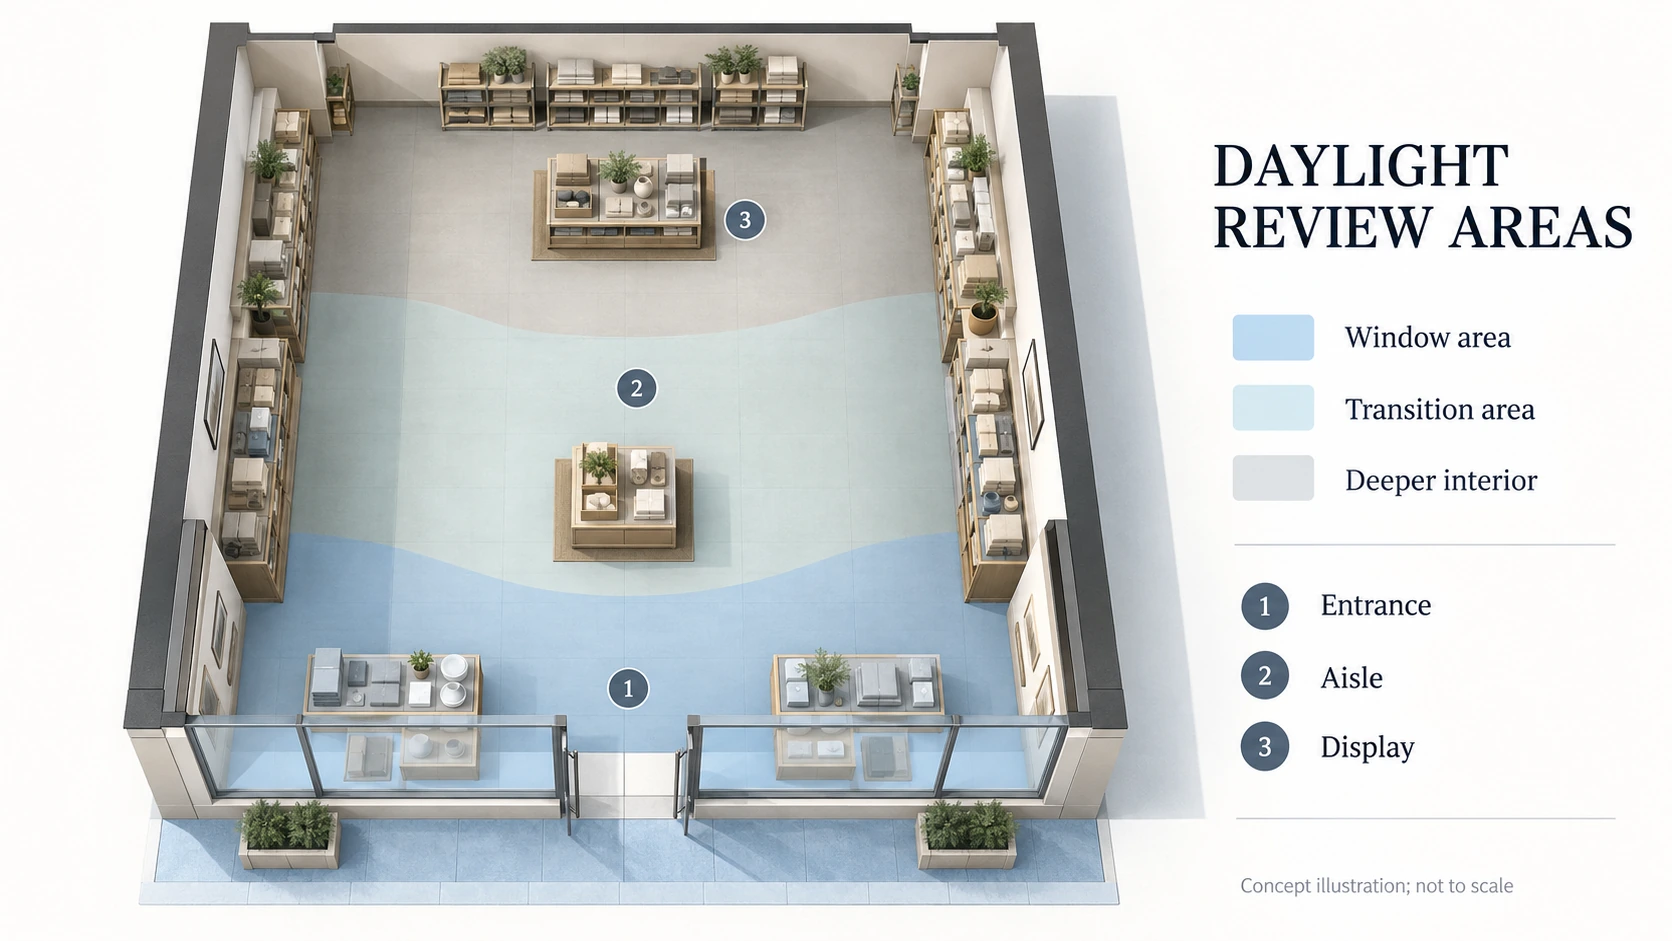
4. Review shading, reflections and materials together
If direct sunlight reaches a customer's line of sight or a reflective surface, discuss its path, shading and product positions with the architectural, interior and merchandising teams. Then review how artificial lighting should contribute. Changing electric light output alone cannot guarantee a solution to direct sunlight or its reflections.
Check glass showcases from customer positions. During the day, reflections of windows or the outdoor environment may interfere with product viewing. After dark, examine reflections of indoor fixtures and illuminated elements. Identify the source before adjusting the arrangement; our glass display lighting and reflections guide explains the review method.
Include walls in the comparison. On the same textured wall, different daylight directions and electric lighting combinations require another review of the background effect, shadows and product emphasis. For the intended wall effect, see wall washing vs. wall grazing for retail interiors.
Use representative leather, textiles, metal, packaging and background materials to review product detail and color appearance. Establish which surfaces need to be visible and the intended presentation before discussing light source configurations or tunable white requirements.
5. Confirm the lighting scenes, then define the control requirements
Once the intended effect in each area is clear, discuss an adjustment method suited to the project.
- Manually selected scenes: staff select an accepted setting under agreed conditions. Define when to use it and who operates it.
- Scheduled scenes: settings follow operating schedules, with a review of their suitability under different weather conditions.
- Automatic response to light levels: light measurements influence the output of relevant groups. Confirm that the complete scheme supports this function.
Daylight regulation uses light sensor measurements to influence luminaire output. It is a function implemented within a specific control scheme, as described in the DALI Alliance's recommended terminology.
Selecting fixtures with DALI functionality still requires confirmation of the scheme's light inputs, lighting groups and scene settings. Tell the controls team which areas should respond to daylight, which viewing tasks must remain supported and how the agreed scene should be restored after manual operation. Our DALI lighting system guide introduces the basic system concepts.
An automatic scheme also needs an on-site review of products and backgrounds. Sensor measurements alone do not represent the display as customers see it. Follow the selected system's installation, calibration and commissioning instructions, then review representative daylight conditions.
6. Hand over the accepted effects for different conditions
Once the arrangement is confirmed, prepare a concise record for the design, installation, merchandising and operations teams.
- Main viewing positions, areas affected by daylight and featured products.
- Review times, weather, shading states and the products and materials used during approval.
- Lighting groups, aiming targets and applicable scene settings.
- Conditions for using each scene, the person responsible and changes requiring another review.
- Corresponding photographs, measurement positions and outstanding adjustments.
As an illustrative scenario, consider a street-facing handbag store where afternoon sunlight illuminates the window background while handbag fronts farther inside remain unclear. The team can first review incoming light and product placement, then adjust the background and product lighting separately where the scheme permits. After dark, return to the same positions to assess whether the accepted daytime settings remain suitable and record any nighttime adjustments.
When discussing this type of project with SEEPOSH, start with daylight opening locations, a floor plan, main viewing directions and representative photographs from different times. Explain the desired presentation of products, walls and labels, together with the intended control requirements.
We can use this information to discuss fixtures, optical distributions and custom configurations, and identify what needs to be confirmed in a mockup or on site. Explore our customization process, or send drawings and reference photographs through our contact page.
Frequently asked questions
Can I reduce all store lighting when the entrance is already bright during the day?
Review the viewing task in each area first. The deeper interior, product fronts and labels may still need electric lighting. Make adjustments according to the daylight zones and lighting groups, reviewing each area separately.
Can ordinary dimming solve sunlight or glass reflections?
Dimming changes the output of the relevant artificial lighting. Direct sunlight and glass reflections also require a review of incoming light, shading, product and fixture positions, and customer sightlines before selecting an adjustment.
Must artificial lighting change color temperature between day and night?
Establish how products and materials should appear, then compare representative daytime and nighttime conditions. The need for tunable white depends on the design intent, viewing results and selected configuration. Daylight entering the store alone does not determine this option.
Is an on-site review still needed after installing a light sensor?
Yes. Confirm the area and lighting groups associated with the sensor, then check products, labels and backgrounds from the main viewing positions. Changes to shading or display layouts should also prompt an assessment of whether another review or commissioning adjustment is needed.


