

Low ceiling retail lighting starts with two questions: how will the luminaires fit within the available space, and what will customers see while looking at the merchandise?
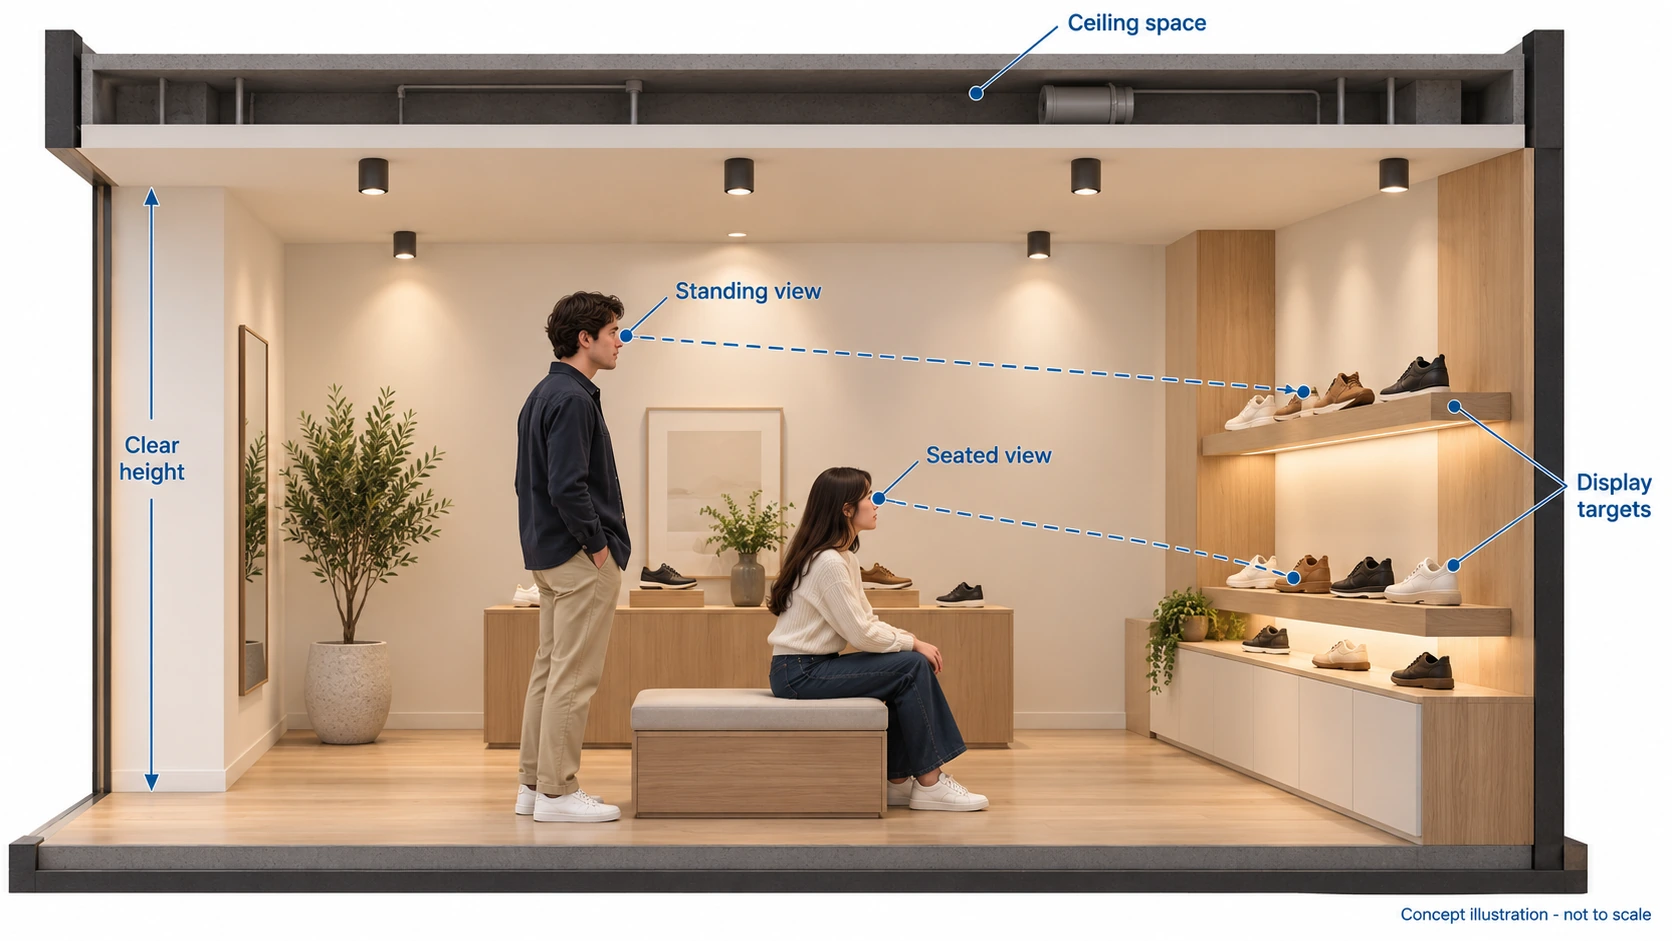
When clear height is limited, the fixture projection, merchandise height and customer viewing positions need to appear in the same section drawing. A compact luminaire can still expose a bright aperture from a particular position. A layout carried over from a taller room may also illuminate only part of the product.
This guide addresses retail interiors where clear height, local beams or display arrangements restrict lighting positions. Recording the space and sightlines first gives the team a practical basis for coordinating background, accent and display lighting.
1. Record Clear Height, Ceiling Space and Fixture Projection Separately
The height shown on a floor plan may not describe the space available for lighting. The team needs the relationship between finished surfaces, including local differences at entrances, aisles, beams and feature displays.
Draw a section through a representative area and record these conditions separately:
| Condition to record | How to document it | What it helps the team check |
|---|---|---|
| Actual clear height | Measure from the finished floor to the finished ceiling; identify beams and other local projections | The height remaining over circulation areas and displays |
| Available ceiling space | Mark structure, services and other obstructions; identify areas still requiring confirmation | Whether the proposed configuration fits and what space it requires |
| Fixture projection | Show the lowest point and adjusted position using the proposed fixture's actual outline | Conflicts with aisles, cabinet tops or signs |
| Merchandise and shelf heights | Identify product faces and targets on upper and lower shelves | Distances and obstructions between the emitting position and each target |
| Main viewing positions | Record standing browsing, seated fitting and close label-reading positions | Which luminous surfaces or reflections enter the customer's view |
Use consistent floor and finished-surface references. Where a fixture will be aimed, include its outline and space requirements in that position. Dimensions taken before adjustment may miss a conflict.
The resulting drawing makes the discussion specific: which areas offer enough space, which need a change to the lighting or display position, and which require more site information. Check the space required against drawings and installation requirements for the selected configuration.
2. Check Fixtures and Luminous Apertures from Customer Positions
A luminaire may look different from the entrance, in front of the merchandise and from a fitting seat. Review a low-ceiling project from the places where customers will spend time, alongside the ceiling drawings.
Start with three representative viewing tasks:
- Standing browsing: Look at the display from the entrance and aisle. Check the relationship between fixture bodies, luminous apertures and featured merchandise.
- Seated fitting or consultation: Look toward products and opposite displays from the seat. Check for bright points, reflections or obstructions that appear from this position.
- Close product inspection: Move toward a shelf, showcase or label. Observe whether a light source becomes exposed as the customer's position changes and whether product details remain visible.
Fixture visibility and glare require separate judgments. CIE associates glare with visual discomfort or reduced detail visibility caused by unsuitable luminance distribution or strong luminance contrasts. Seeing a fixture body alone does not establish that condition. CIE definition of glare
At each position, record the specific concern: does the luminous aperture take attention away from the product, encourage the observer to avoid a direction, or interfere with seeing details? Then compare changes to position, aiming, shielding or output with the design team. Recheck product illumination after each change.
A recessed fixture still has a luminous opening to review from actual sightlines. Shelf lighting also needs checks from normal browsing and seated positions. Where glass or mirrors are present, distinguish a direct view of the source from its reflected image. See the review method in glass display lighting and reflections.
3. Check Coverage at the Actual Distance to Each Product
A lower ceiling does not give every product the same distance to the luminaire. Upper shelves, low display tables and inclined product faces have different target positions; record them separately.
In simplified geometry with a beam directed perpendicular to a target, the same beam angle produces a smaller footprint as distance decreases. Real displays also involve angled aiming, luminaire distribution, product shapes and obstructions. That relationship provides a starting point for a coverage check.
Identify the areas that need to be visible, such as a shoe's upper, side profile, material texture and label. Observe whether light reaches those areas, where the beam edge falls and whether light extends beyond the product onto a neighboring background.
If a proposed position illuminates only part of the product, compare changes to position, aiming or distribution. When coverage expands, check what happens to shelf edges, adjacent merchandise and the customer's view. A wider beam needs to be assessed against those results.
Have an observer stand where a customer would normally inspect or handle the product. Their body or arm may block light arriving from above. An upper shelf may also shade merchandise below it. Identify the obstruction before discussing how lighting and display arrangements could work together.
Use beam angle and mounting distance for a closer comparison of distance and coverage. During selection, review the proposed configuration's photometric information, calculations or mock-up to confirm its performance at each target height.
4. Coordinate Light on Walls, Merchandise and Working Positions
Review merchandise alongside its surrounding background. Give each lighting layer a clear task: how visible the wall should be, which products need emphasis, and where customers or staff need to read labels, fit shoes or hold a consultation.
The LEDiL retail lighting optics guide also separates ambient, accent, shelf and task lighting by purpose. These roles provide a useful way to organize a proposal before selecting positions and configurations for the actual space.
Check wall or background lighting on its own first. Observe the finish color, gloss, joints and shelf edges. Add the merchandise lighting and check whether product faces are clear, whether the background competes for attention, and whether adjacent products have unnecessary differences in emphasis. The guide to ambient and accent lighting in retail explains how to organize this review.
Wall effects should support the display task. A smooth wall intended as a continuous background calls for a different discussion from a textured surface whose relief should be visible. See wall washing and wall grazing for that comparison.
If a conspicuous patch appears on the ceiling or at the wall junction, record where it is most noticeable. Compare changes to output, aiming or layout. Increasing output across a whole area changes the background, merchandise and luminous apertures together, so assess the complete scene again. For coordination with architecture and display joinery, see the architect's guide to linear lighting.
5. Review a Representative Display Bay, Then Walk the Customer Route
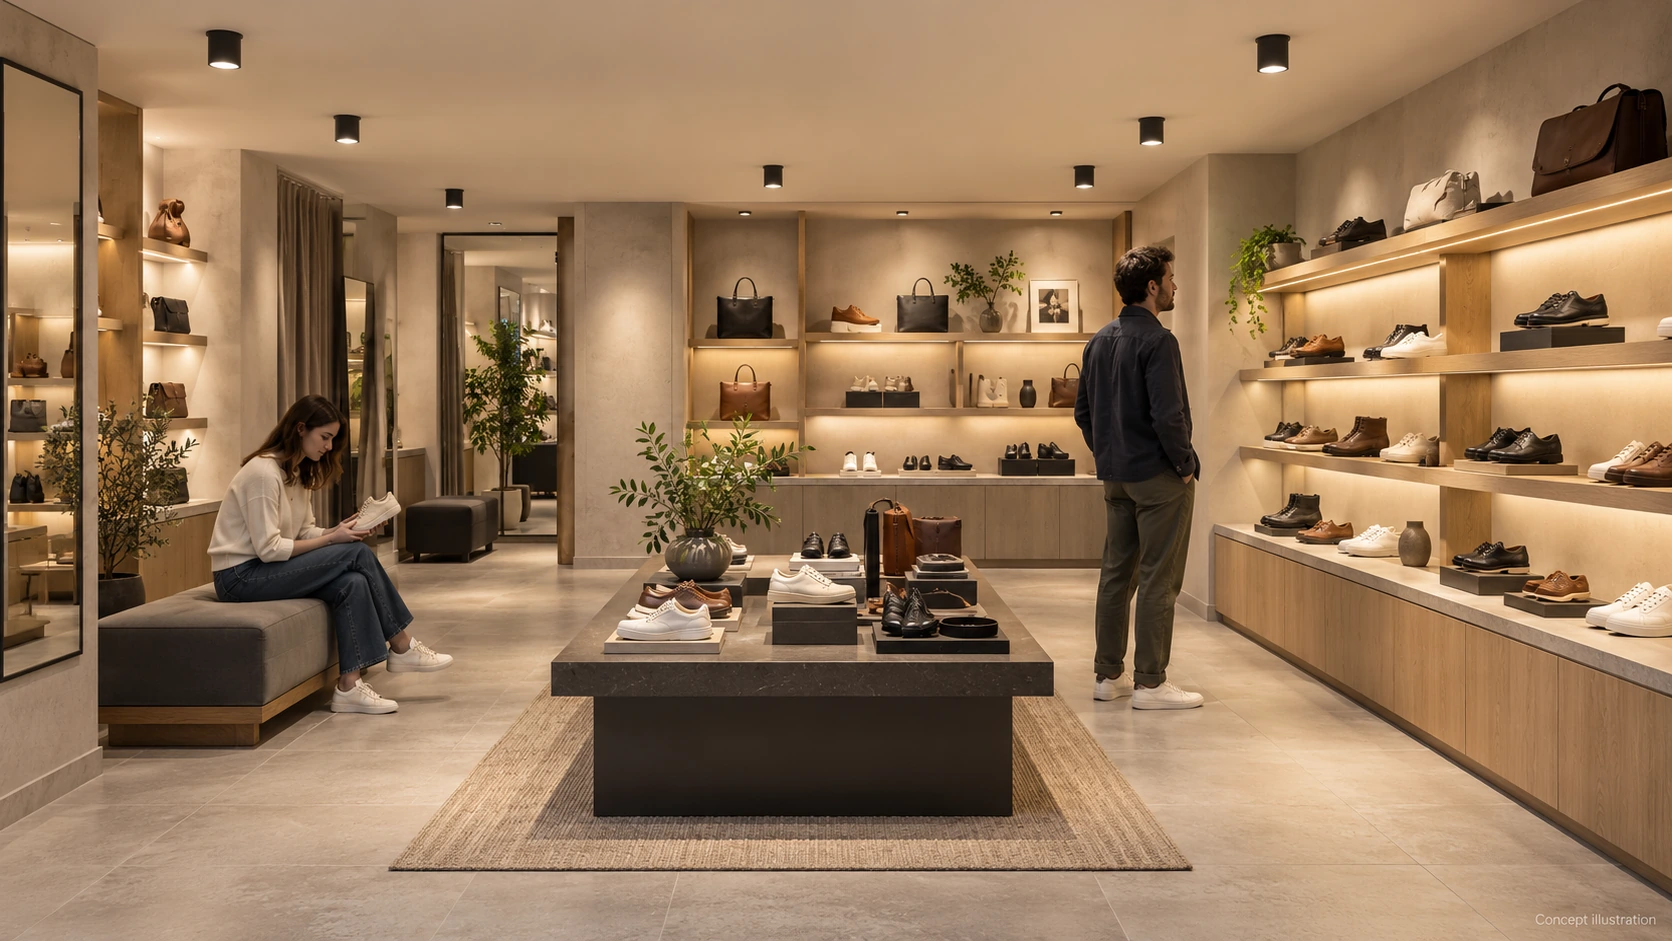
Consider a hypothetical footwear boutique with upper and lower wall shelves, a display table beside the aisle and a nearby fitting seat. Select a bay that includes these conditions for a lighting mock-up.
Use representative dark, light and glossy shoe samples, together with the intended shelf finishes and labels. Switch background and merchandise lighting on separately to observe their roles, then review them together in the proposed operating scene.
Use a record like this to document observations and changes:
| Viewing task | What to record | What to recheck after adjustment |
|---|---|---|
| Standing view of the display | Which luminous apertures or patches attract attention first; whether product faces are clear | The product-background relationship and any new concern from the seat |
| Seated view from the fitting bench | Exposed shelf sources, bright points in mirrors or uncomfortable luminous apertures | Normal seated viewing and turning toward merchandise |
| Close label reading | Body shadows, shading from upper shelves and reflections on labels | Whether labels, products and neighboring shelves improve together |
| Moving through the entrance and aisle | Bright points appearing as position changes; fixture conflicts with signs or cabinet tops | The viewing experience between representative stopping positions |
Change one condition at a time and record what changed. Photographs from fixed positions can support comparison. The observation should also include moving the eyes, sitting down and approaching merchandise.
After accepting a representative bay, review corners, areas below beams, mirror locations and shelves at different heights. Their geometry and materials may require different adjustments. Record accepted fixture positions, aiming and the associated display arrangement so they can be reviewed during implementation and future merchandising changes.
6. Prepare a Useful Brief for the Lighting Team
For low ceiling retail lighting selection, bring the following information together:
- Plans and sections showing finished surfaces, local clear heights and occupied ceiling space.
- Positions and dimensions of merchandise, shelves, tables, mirrors, signs and seats.
- Main standing, seated and close inspection positions, supported by site photographs.
- The lighting task in each area and the acceptable extent of fixture projection.
- Configuration details to check, including dimensions, adjustment space, optical accessories and photometric information.
- Conditions accepted in the mock-up and issues still requiring resolution.
Through SEEPOSH's customization process, these inputs can support a discussion of fixture dimensions, appearance and optical configuration for the project. Confirm the proposed solution against the relevant drawings and samples.
When planning a store or adjusting an existing display, share the space drawings, representative merchandise and viewing positions with the SEEPOSH team. Identify what needs illumination, where it will be viewed and which spatial conditions restrict lighting positions.
Frequently Asked Questions
How low does a ceiling need to be for this approach to apply?
Review the project's actual constraints: clear height, beams, occupied ceiling space, fixture projection and merchandise height. When these affect positioning, sightlines or coverage, include the corresponding section and viewing checks. This guide does not assign a universal height boundary.
Is choosing a slim or compact fixture enough?
Dimensions address part of the spatial question. Also confirm the space occupied after adjustment, luminous aperture visibility, product coverage and obstructions before accepting a configuration.
Should low-ceiling stores use wide beams throughout?
Select distribution around product size, actual distance and the area requiring illumination. When a beam expands, check spill beyond the product, bright shelf patches and viewing comfort. Support the selected configuration with photometric information and a mock-up.
Can ceiling fixtures illuminate all the merchandise?
Check the light reaching each target from the proposed ceiling positions. Shelves, customer bodies and cabinet structures can change obstruction conditions. If products or labels remain difficult to see, discuss supplementary display lighting and recheck source visibility.


