

A brand sign can look like a clean, even field of light in a rendering, and then look quite different once it’s installed in a store. The edges of the graphic are bright while the middle is dim. LED dots are visible in some spots. One display panel glows brightly while the one next to it looks grayish. Customers may not be able to say exactly what’s wrong, but these inconsistencies can undermine an otherwise polished visual design.
How well a sign backlights depends on the graphic material, the light source, the mounting structure and the power supply all working together. For designers and shopfitting teams, it is more effective to define the intended visual result before production, and then check the structure and power in sequence once it’s assembled, rather than judging the whole solution from a single lit photo.
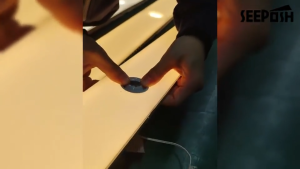
First decide: are you lighting a sign, a printed graphic, or a display background?
“Sign backlighting” can mean different tasks. Standalone letterforms need a clear, well-defined outline. Printed graphics need both the imagery and the text to be legible. A large display background is more concerned with the continuity of the whole glowing surface. The three differ in visible edges, obstructions and viewing distance, so the light source arrangement won’t be identical either.
Before choosing a light source, mark four things on the drawing: which part must glow, which part must not let light through, where customers view it from, and how much installation depth is available behind it. If the graphic itself has dark printing or multiple material layers, the sample should use the intended materials too, not a plain white sheet as a stand-in.
Based on these conditions, a project can evaluate a light guide panel, a side-emitting LED strip, a linear light source or another suitable backlighting structure, and may need to combine more than one. SEEPOSH can discuss combinations of light source and structure based on project requirements. Which one to use should be decided by the graphic’s size, shape, installation depth and intended effect together.
If the middle looks dim, check the light-emitting structure first
If the edges are bright and the middle is clearly dim, first record the shape and position of the dark area. Is the whole center of the graphic dim, or is it blocked by a fixing point, a seam or part of the printed image? Does the problem only appear once the graphic is mounted, or is it visible even with the graphic material removed? These observations help identify whether the cause is the light source layout, the light-guiding or diffusing design, structural obstruction, or the graphic material itself affecting the final look.
For an edge-lit structure, check where the light enters, how far it has to travel, and how the effective emitting area connects to the light-entry edge. For a structure with the light source placed behind the graphic, check the light source layout, its distance from the graphic, and whether the backing and diffusing material suit the current size. When a graphic is thin, the frame is narrow, or the shape is complex, this needs to be verified on the actual structure — a single fixed light-source spacing or panel thickness should not be applied to every sign.
It’s also worth separating “the graphic looks dark” from “the light source is dim.” Dark ink, an opaque decorative layer, reinforcing ribs or a mounting frame can all make part of the front surface look dimmer. Check the bare, unencapsulated backlighting structure and the finished front view with the graphic mounted separately, then decide which layer to adjust. Adding more lights does not necessarily fix material obstruction or structural shadowing.
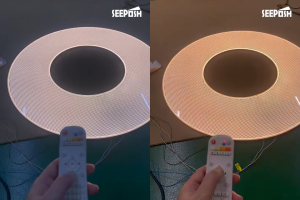
For uneven brightness, check the power supply too
Beyond the structure, power is another line of inquiry. First confirm the input voltage the fixture or strip requires, and whether the actual power supply, controller and connections match it. Then have a qualified person check the voltage at relevant points while the unit is lit. On a longer strip or with multiple connected sections, the voltage difference between the far end and the start can show up as gradual dimming along the length. Voltage drop can genuinely affect brightness, but a dim middle in a graphic does not automatically mean a voltage problem — it should be judged together with the shape of the dark area and the structure.
SEEPOSH has shown a signage solution in a side-emitting LED strip product post, mentioning a 3 mm width and 12V/24V configurations. This describes the direction of that specific product, not that different voltage versions can be mixed on one line, and not that it suits every sign. When settling on a solution, check the power supply, cable length, control method and installation conditions against the specific model selected.
If you’d like background on choosing between the two voltages, SEEPOSH’s 12V vs. 24V LED strip article covers that trade-off. What matters here is narrower: does the power supply match the light source you’ve chosen, and does every part of the finished piece light up as expected.
Don’t just check the light source — check the finished graphic
A backlighting structure that lights evenly on its own does not guarantee the same result once a brand graphic is applied. The actual graphic’s light transmission, color and image density change how it looks. Seams, frames and fixing points can also leave dark lines visible from the front. If the sign sits near glass, mirrored metal or other lighting, reflections will change what customers actually see.
Build a sample that represents the hardest part of the final design, using the real graphic material, frame and installation depth. Look at it from the front, and also from the side angles customers pass by. Check for LED dots, bright edges and dark zones locally, and also whether the whole graphic looks coordinated with the surrounding space. Photos are useful for recording where a problem is, but automatic exposure and white balance can hide or exaggerate brightness differences. The final judgment should combine viewing the actual piece with conditions both sides have agreed on.
If your project uses a light guide panel and is already showing bright edges, dark zones or visible LED dots, SEEPOSH’s light guide panel uniformity troubleshooting article goes further into that. That article focuses on the panel and how light enters it. A signage project also needs to check the graphic, the frame, the power supply and the actual on-site viewing conditions together.
Check against this list before delivery
| What to check | Questions to answer |
| Graphic | Once the final imagery, colors and material are mounted, is the text clear, and does any dark area fall on important information? |
| Light-emitting structure | Are the middle, edges, corners and seams consistent? Are LED dots or structural shadows visible? |
| Power supply | Does the chosen light source match the supply voltage? Does brightness fade over a long run or multiple connected sections? |
| Viewing position | From the main foot-traffic direction, from the front and from the side, does the result consistently meet the design intent? |
| Maintenance | Can the graphic, light source and power supply be removed or serviced later as designed? |
These questions are best confirmed together at the sample stage. Once the graphic, frame and store finishes are all fixed, there is usually far less room to adjust if a dim center only shows up then.
What to prepare when discussing a signage backlighting solution with SEEPOSH
For the first conversation, send the front view and section drawing of the sign or display graphic, along with a rendering of the intended result, and note the effective emitting area, overall dimensions, available installation depth, graphic material, visible edges, power entry point, and whether it will be used indoors or outdoors. If uneven brightness has already appeared, attach a full front-view photo of the graphic, close-ups of the dark area, and photos of the unencapsulated structure, and mark where and when the problem is visible.
SEEPOSH can discuss a suitable backlighting combination and sample inspection method based on these conditions. Start with our customization process, then send drawings and photos through the contact page, describing the area you want lit and the problem you need solved.
Frequently asked questions
If a display graphic is dim in the middle, is adding more lights enough?
Not necessarily. First check whether the dark area comes from the light source layout, the light-guiding or diffusing structure, the graphic material, or an obstruction from a mounting part. If the cause is the material or structure, simply adding more light sources may brighten the edges further without improving the middle.
Can 12V and 24V LED strips be swapped directly?
Not based on appearance alone. Check the chosen strip, power supply, controller and wiring design together. If unevenness already exists, also determine whether it comes from the power supply condition or from a localized dark area caused by the structure.
Can a photo of the unencapsulated, lit structure confirm the final sign’s appearance?
Not fully. The final graphic material, printed imagery, frame and on-site environment all change the appearance. An unencapsulated photo is useful for checking the light source and structure, but the actual result should still be observed once the final graphic is mounted.


