

A wine cabinet can look bright from across the shop while customers still struggle to identify the bottles. A shelf edge may catch the light, a glossy label may show a bright streak, or the front row may obscure the wines behind it.
Planning wine display cabinet lighting starts with the bottle arrangement and the information customers need to see. For a red wine display, this often means recognizing the producer, reading the vintage and finding the corresponding price. Bottle shape, rack structure, label material and viewing position all affect those tasks.
This guide focuses on retail wine cabinets and display racks. It follows the design from bottle placement to fixture position, then checks how the arrangement performs when stock is removed or replenished.
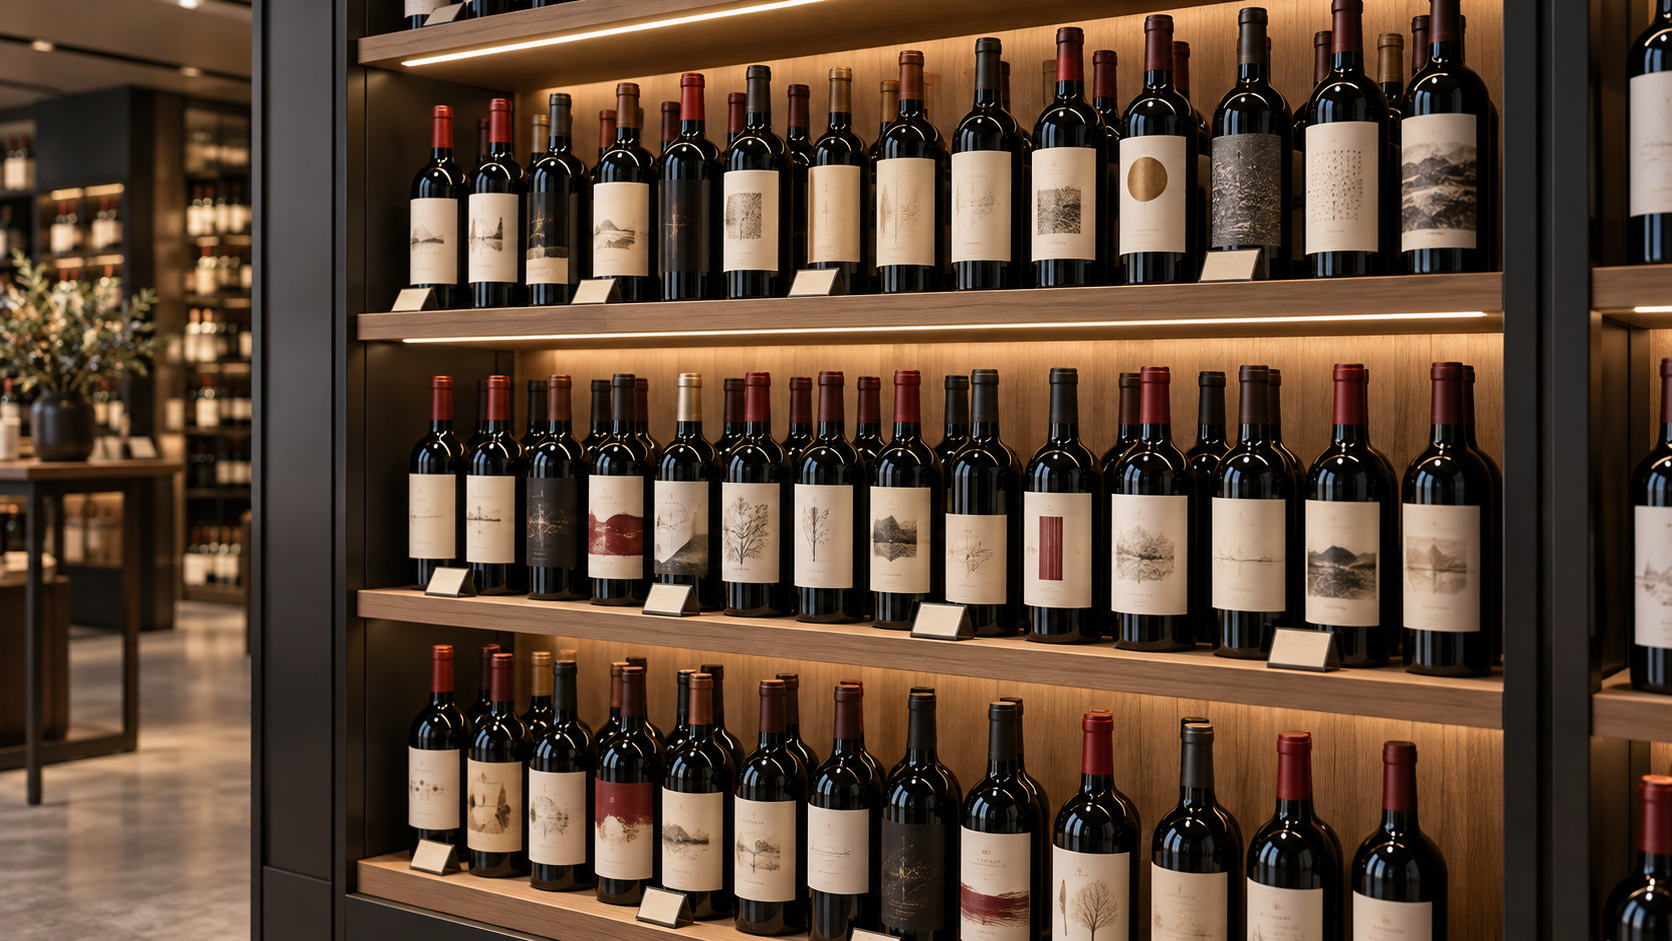
1. Draw the Bottle Arrangement Before Positioning the Lights
Start with an elevation and a section of the populated cabinet. Mark the bottle body, neck, label, shelf edge, rack supports and price cards. Include the customer’s approach direction and the positions used for browsing and closer inspection.
Confirm the intended bottle orientation with the merchant. An upright row, an inclined presentation rack and horizontally held bottles expose different surfaces to the customer and to the light.
| Bottle arrangement | Main viewing task | What to check before selecting a fixture |
|---|---|---|
| Upright, labels facing the aisle | Identify the producer and vintage across the row | Whether the shelf above or a neighboring bottle shades the label; whether the price card is visible |
| Inclined or horizontal bottles in individual supports | Read the label in its intended presentation position | Label rotation, rack bars crossing the lettering and light reaching the exposed label surface |
| Several bottles deep on a shelf | Identify the displayed wine and understand the stock arrangement | Which bottle represents the product, what the front row hides and how the view changes after removal |
Agree which bottles are the visible presentation and which are reserve stock. Reposition an obstructing bottle or rack member before adjusting the lighting. For deep shelves, record the intended replenishment position so staff can restore the accepted display.
2. Place Shelf Lighting Where It Can Reach the Label Face
For an upright row, a compact linear fixture beneath the shelf above can be a useful starting point for a mock-up. Compare mounting positions near the front and farther back, using the real shelf depth and bottle height.
A fixture placed deep inside the cabinet may illuminate bottle shoulders or the rear surface while leaving front labels shaded. A position closer to the front may improve the light reaching those labels, but it also needs a check for direct source visibility from the aisle.
Draw the fixture’s emitting surface and the label area together. Include any shelf lip or recess intended to conceal the light: that detail can also obstruct its path toward the merchandise. Confirm both the concealed appearance and the label illumination in the same sample.
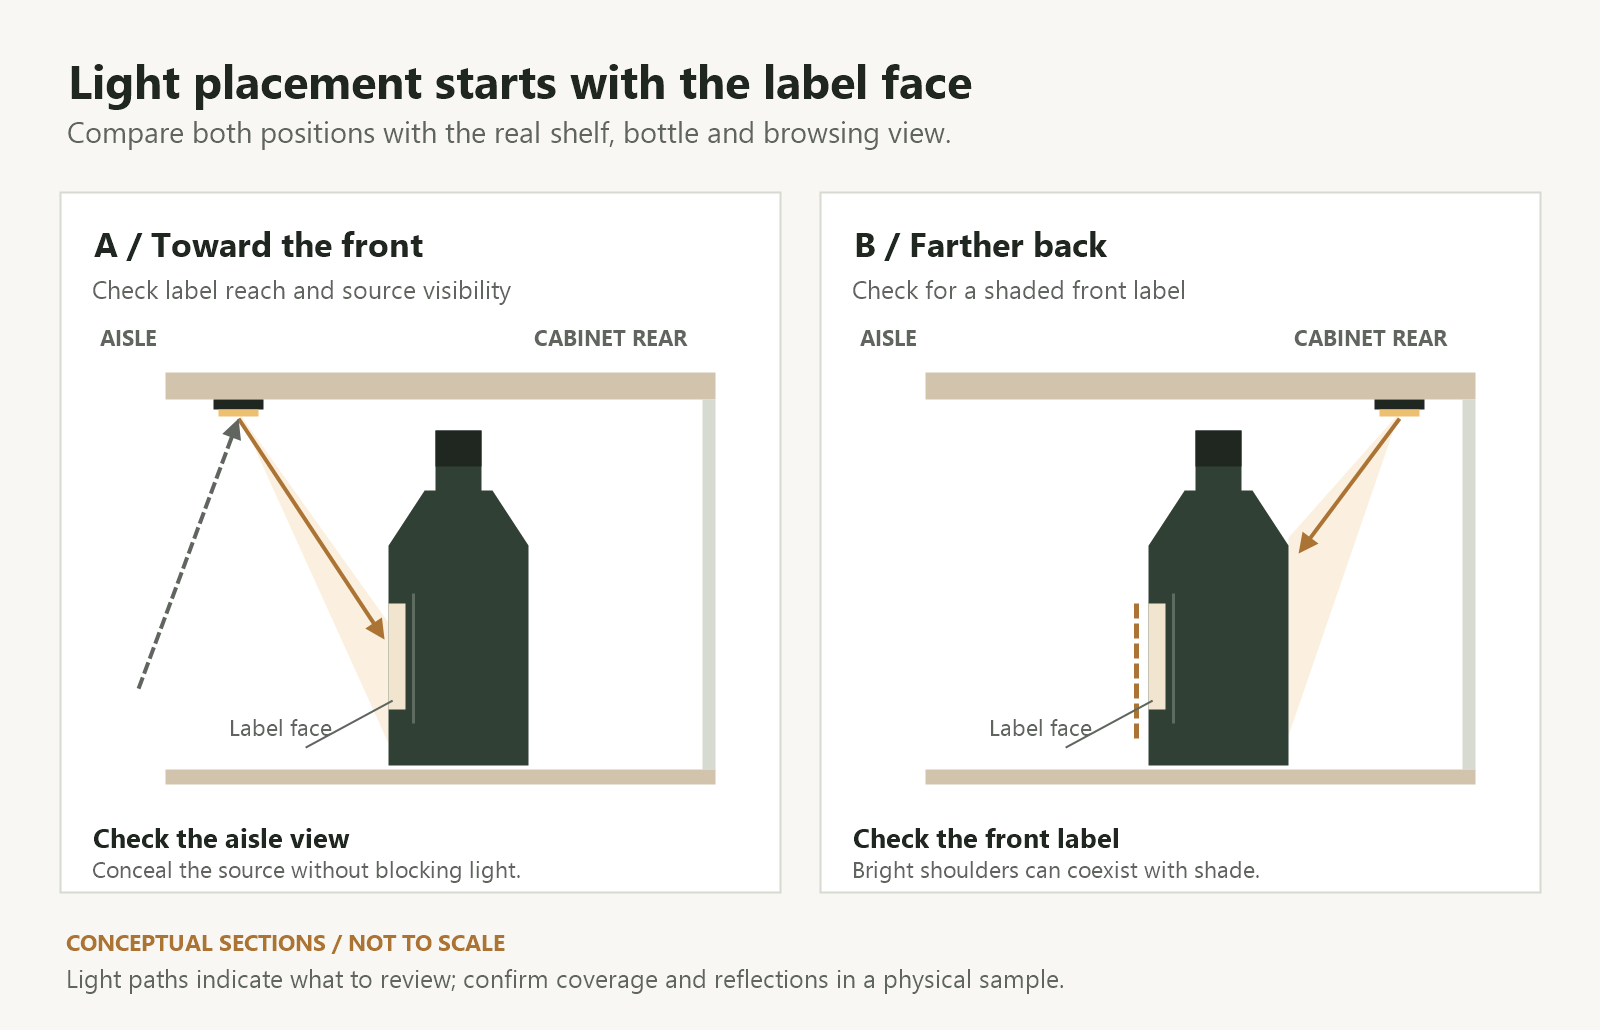
Compare the upper, middle and lower shelves separately. Their distance from the customer and the angle at which the shelf underside is seen can differ. One repeated mounting detail needs to work at each level.
Where an individual bottle or a small feature group needs emphasis, compare an accent fixture with the shelf lighting. Define the target before choosing its beam. Our guide to beam angle and mounting distance explains how those two conditions affect the coverage to review.
3. Separate Bottle Highlights from Reflections in Cabinet Glass
Inspect matte paper, glossy printing and metallic label details using representative bottles. A highlight on curved glass can help describe the bottle’s shape; a bright streak across the producer’s name can make the same display harder to browse.
When a reflection interferes with reading, keep the bottle and viewing position fixed while comparing light direction or fixture position. Then check from the aisle approach and close inspection positions. An adjustment that clears the lettering from one point may move the interference elsewhere.
For cabinets with doors or front glazing, record three conditions separately:
- Highlights on the bottle, foil capsule or glossy label.
- The fixture’s emitting surface seen directly through the cabinet glass.
- Reflected images of room lights, windows or other bright surfaces in the glazing.
Use the store’s normal lighting during the combined review. A ceiling fixture reflected in a cabinet door requires a different adjustment from a highlight on the bottle itself. Our glass display reflection guide provides a method for identifying the source and viewing position.
If a luminous rear panel is proposed, check the front labels with that panel operating on its own and with the merchandise lighting. Its role may be to establish a background or reveal bottle outlines. An opaque paper label still needs suitable light reaching its front face.
4. Include Display Conditions and Operating Hours in the Brief
Agree on the appearance of paper labels, colored printing, foil details and cabinet finishes using the proposed light color. Assess a representative selection of actual bottles together, including dark glass and different label finishes.
Wine exposure requirements also belong in the project brief. A published study of light transmission into wine bottles examined how source spectra and bottle glass affect the radiation reaching the wine. Ask the merchant or producer to define the permitted display conditions and operating hours for the actual wines, then include those requirements when reviewing the lighting proposal.
Specify whether the cabinet is open, enclosed or refrigerated. For enclosed units, review the temperature near the bottles with the lighting operating as intended. For refrigerated units, coordinate the fixture environment, condensation conditions and installation with the cabinet supplier.
Provide those conditions alongside the visual brief so the proposed fixture configuration and cabinet construction can be assessed together.
5. Review the Cabinet When Full, Partly Empty and Replenished
A full shelf is only one operating condition. When a front bottle is taken out, the light may reach the back row differently, expose a fixture or make a bright background more prominent.
Build a representative cabinet bay using the intended racks, shelf edges, glazing and bottle samples. Include light and dark labels, glossy and matte finishes, foil capsules and the price cards customers will use.
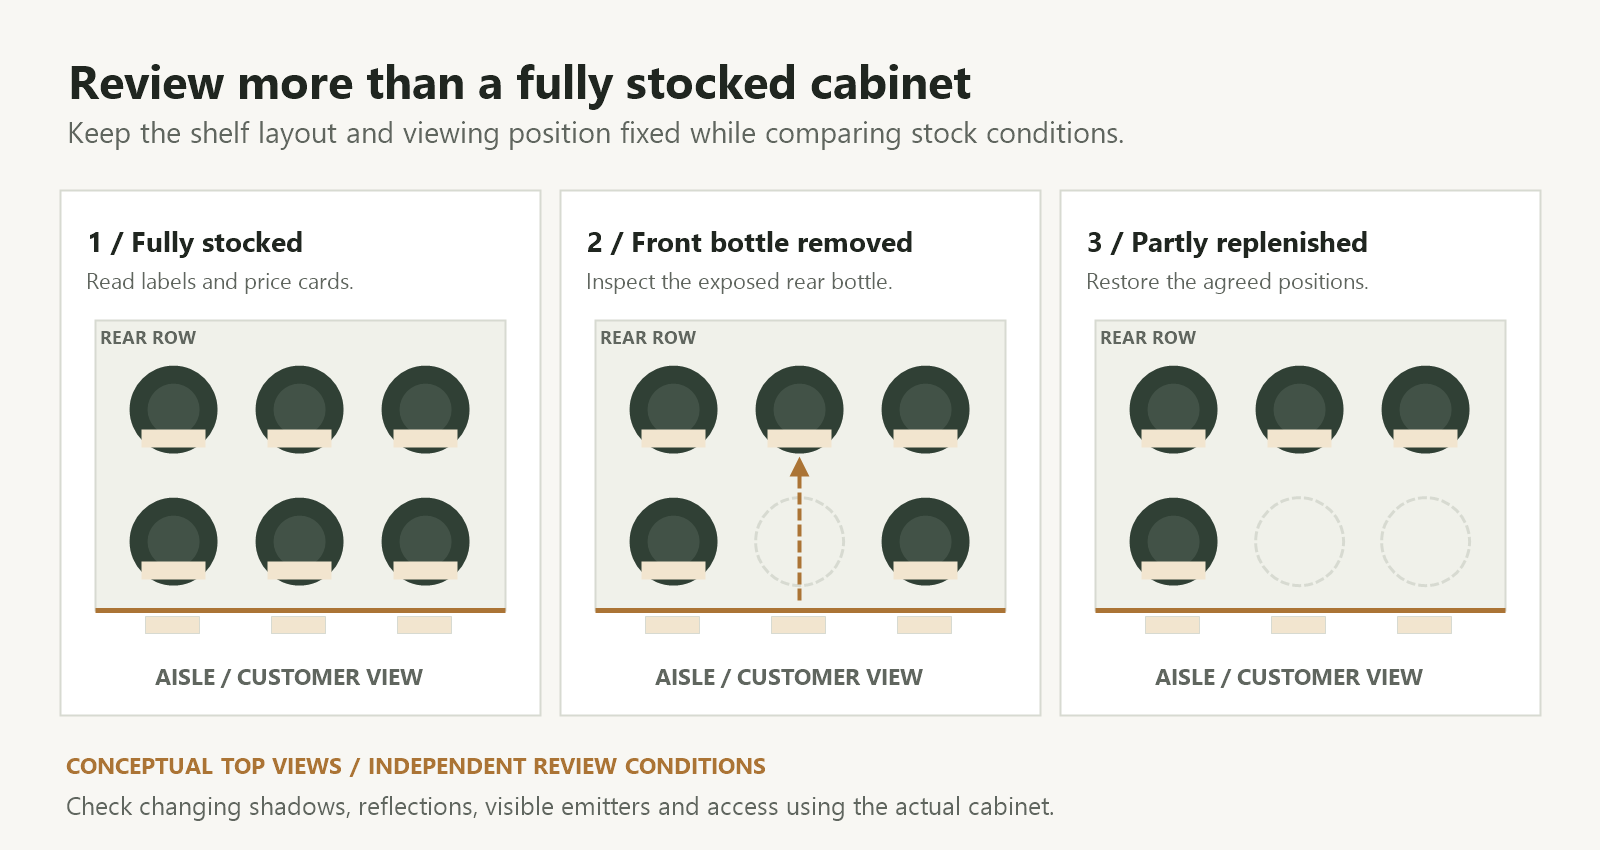
Review the bay in these conditions:
- Fully stocked: check label readability, bottle-to-bottle shadows and the relationship between each wine and its price card.
- A front bottle removed: check the newly exposed rear row, bright surfaces and direct views of the light source.
- Partly replenished: check whether staff can restore the approved positions without moving fixtures or concealing labels.
- Viewed along the aisle: check changing reflections and whether the upper and lower shelves remain understandable.
- Accessed for service: confirm that bottles, rack supports and lighting components can be handled through the intended openings.
Record the accepted fixture positions, aiming directions, lighting settings and bottle arrangement. Photographs from fixed positions can support comparison; review the lettering and customer route in person as well.
6. Prepare the Information Needed for a Lighting Proposal
For a new wine display cabinet or an adjustment to an existing one, bring together:
- Cabinet elevations and sections showing shelf depth, rack supports, glazing and available mounting space.
- Representative bottle dimensions, label materials and the intended presentation orientation.
- The bottle layout at full stock and the arrangement staff should restore after replenishment.
- Customer viewing positions and the producer, vintage and price information that needs to be readable.
- Store lighting conditions, operating hours and the merchant’s requirements for the wines on display.
- Sample review notes identifying shaded labels, troublesome reflections and access constraints.
These inputs help SEEPOSH discuss fixture dimensions, optics, mounting positions and available adjustment with the actual cabinet in view. Confirm the proposed capabilities against the selected configuration and sample through our customization process.
To discuss wine display cabinet lighting, send the SEEPOSH team your cabinet drawings and representative bottle information. Clear label positions and viewing tasks give the proposal a practical starting point.
Frequently Asked Questions
Should every red wine cabinet use warm white lighting?
Choose the light color by comparing the actual labels, bottles and cabinet finishes under the proposed lighting. Include the merchant’s display requirements in the specification. A color temperature value alone does not describe the complete source spectrum or establish suitable exposure conditions for the wine.
Can backlighting make wine labels readable?
A luminous background can define bottle outlines and the cabinet’s appearance. Check opaque front labels separately: they need light reaching the label face. Compare the background and merchandise lighting individually, then together, using the intended bottles.
Can one lighting detail be repeated across every shelf?
Test it at the upper, middle and lower levels, including the planned bottle heights and stock depth. Review source visibility and label illumination at each level, then record any differences needed in mounting or aiming.
What should be checked after the wine selection changes?
Review bottle height, label position, finish, rack fit and price-card alignment. Recheck reflections and shaded areas from the accepted viewing positions, then confirm that the replenishment layout remains workable.


