

In a high-end retail space, a softly glowing shelf or an illuminated display backdrop can flatter a product more than any exposed fixture. In practice, though, the hard part is rarely “can it light up?” The real questions are these: Is the glowing surface even? Will edges and corners show dark zones? Can the size, wiring and mounting method fit into a cabinet structure that has already been decided?
SEEPOSH Lumisheet light guide panels can be customized to project drawings and are suited to display cases, shelving, brand display walls and similar settings. For designers and shopfitting teams, the earlier the lighting effect and structural conditions are defined, the easier it is to deliver a result that matches the visual intent and can also be installed and maintained without trouble. This article covers eight things worth confirming before you order.
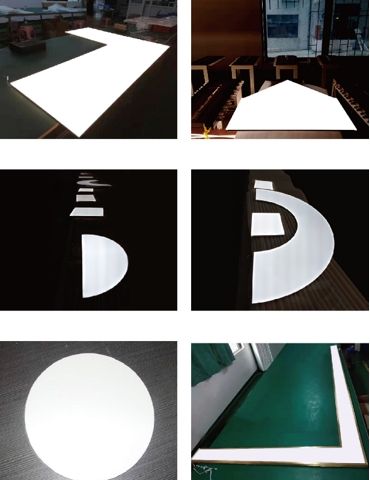
1. Decide which surface should glow
A light panel can do different jobs. It can turn a shelf into a soft glowing surface, provide a backdrop for fragrance or cosmetics, or give a display case a light, floating look. The job determines the construction.
Start by stating how customers will see it. From the front only, or from both sides? Will the edges be exposed? Will the glowing surface sit right against the products or behind them? If you need double-sided illumination, a single-sided design cannot simply be “flipped over.” Appearance, brightness, fixing method and cable position on both sides all need to be considered at the drawing stage.
2. Provide real dimensions, shapes and installation boundaries
A standard rectangle is only a starting point. Retail fixtures may need cutouts, irregular shapes, corner joints, or integration with metal, glass and joinery. SEEPOSH light guide panels can be made up to 4 m × 2 m as a single piece. Whether a project can achieve a given size, thickness and shape still depends on the structure, transport, installation and the intended lighting effect.
When requesting a quote, include more than length and width. Please mark the effective illuminated area, non-illuminated mounting edges, cutout positions, tolerances, visible sides, and whether the panel must be split into sections. A larger panel is not always best made as one piece. Access routes, on-site handling and future replacement are design conditions too.
3. Turn “uniform light” into something you can approve
On an illuminated shelf or display backdrop, customers notice bright edges, dark corners, visible LED dots and seams between panels. On continuous displays or larger glowing surfaces, small irregularities are magnified.
So don’t just write “uniform light” in the brief. It is more useful to state which areas must look continuous, which seams fall within the customer’s sightline, and how the sample will be assessed. Check it at the expected installation distance and in ambient light, from the front, from the side and from the angles customers see while walking past. If the project has firm requirements for brightness consistency, agree the measuring positions and acceptance method during sampling.
4. Treat L-shaped corners as one integrated design
At the turn of an L-shaped display, a booth corner or an interior glass façade, a common problem is that each panel glows well on its own but the joint shows a dark line or a jump in brightness. The corner’s structure, wiring and fixing should not be left for on-site improvisation.
If you want a continuous L-shaped glow, mark the corner angle, viewing directions, dimensions on both sides, seam position and permitted structural edges on the drawings. During sample approval, look closely at the visual continuity at the turn. The final result depends on the finished structure and installation conditions, so a rendering alone is not a basis for promising “no brightness variation at all.”
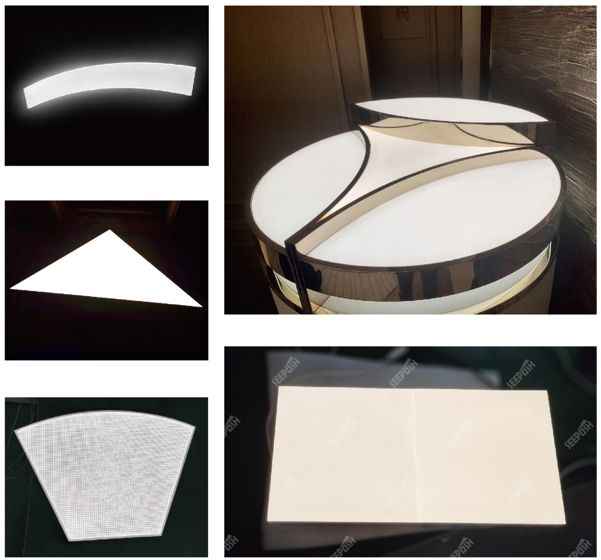
5. Confirm color, glare control and product materials together
The same glowing surface has a different visual job behind jewelry, watches, fragrance or cosmetics. Besides the light color you want, consider the case materials, reflections from packaging, customer sightlines and surrounding lighting. Fixed color, tunable white and colored effects can all be discussed, but the actual range and control method depend on the project solution.
A surface that looks soft is not automatically glare-free from every position. If a panel faces customers directly, reflects in glass, or sits in a dim space, check its brightness, visible angles and diffuser performance. Confirm on a sample case with real materials and products, rather than comparing on-screen renderings.
6. Define outdoor or damp environments separately
An indoor display case and an outdoor façade are different installation conditions. If a project intends to use light panels on an exterior façade, in a semi-outdoor area or in damp zones, state the exposure to rain, cleaning method, temperature swings, drainage and service access in the requirements. SEEPOSH can discuss waterproofing options for a project, but the IP rating must be confirmed against the specific construction, connectors, driver and test documentation. The rating of one solution cannot be applied to every custom light panel.
Beyond waterproofing, consider how the panel is fixed to the building structure, thermal management and future maintenance. For outdoor applications, the design team should assess these together with the visual effect.
7. Plan power, controls and service access early
A light panel looks like a clean surface of light, but the actual system also includes wiring, a driver, power and possibly dimming controls. To keep the “see the light, not the fixture” effect, these components need a suitable place in the cabinet or building detail.
Before sampling, confirm: Where does power enter? Will wiring appear on a visible edge? Where is the driver installed? Can it be serviced or replaced once installed? If you need dimming, tunable white or integration with the store’s control system, provide the control protocol and use case early so that compatibility between the panel, driver and controller can be checked.
8. Approve with a sample, then define the standard for production
Approval of a custom product cannot rest on a single photo of it switched on. A sample should use the target size, or a structure that represents the hardest part of the final design, and be viewed with real finishes, glass and ambient light. For large, double-sided, irregular or outdoor designs, first verify the edges, corners, seams and connections most likely to affect the result.
Once the sample is approved, record the structural drawing, light color, control settings, visual appearance and acceptance method, and use them as the reference for production and reorders. That way, when designers, buyers and manufacturers talk about “matching the sample,” they share the same basis.
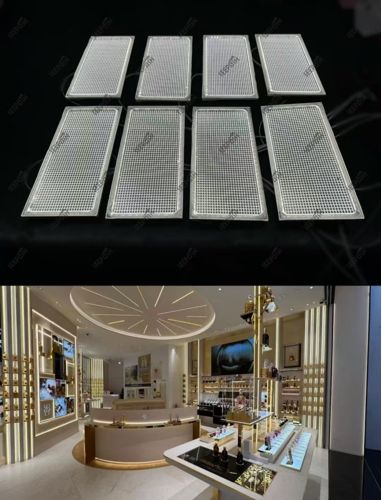
What to send SEEPOSH when asking about custom light guide panels
You don’t need to choose a specific model in the first conversation. The following information helps the team evaluate a solution faster:
| What to provide | Why it helps |
| Plan and section drawings of the display case, shelving or façade | Establish mounting position, visible edges and wiring space |
| Target size, thickness limits, cutouts and irregular outlines | Assess structure, sectioning and fabrication method |
| Single-sided or double-sided illumination | Determine appearance on both sides, fixing and optical approach |
| Photos of the products and surrounding materials | Judge light color, reflection and glare risk |
| Indoor, damp or outdoor conditions | Evaluate protection, fixing and maintenance requirements |
| Dimming and control needs | Check driver and control system compatibility |
| Expected sample and project timeline | Plan sampling, approval and subsequent production |
SEEPOSH can discuss size, shape, lighting method and installation approach based on your drawings and application requirements. You can start with our customization process. If you already have project drawings or are designing display fixtures, send your requirements through the contact page to ask about custom light guide panels and sampling.
Frequently asked questions
How large can a custom light guide panel be?
SEEPOSH light guide panels can be made up to 4 m × 2 m as a single piece. Whether that suits your target size also depends on the shape, structure, transport, on-site installation and lighting effect.
Can I get double-sided illumination or L-shaped corners?
Yes, these can be raised as custom requirements. A double-sided design must account for the appearance and fixing on both sides. For an L-shaped corner, confirm the seam position and visual continuity. The final structure and effect should be confirmed against drawings and samples.
Can light guide panels be used outdoors?
Waterproofing and outdoor options can be discussed for a specific project. The environment, IP requirement, wiring, driver and installation details each need to be confirmed. Do not assume all light guide panels offer the same outdoor performance.
Do I need to choose a model before asking for a quote?
No. Custom light guide panels are usually evaluated against project drawings. Send the dimensions, shape, application, glowing-surface requirements and installation conditions through the contact page to start the conversation.


